


We began constructing the caravan in late fall, 2004. Our plan was to construct all four walls in the shop and then move them outside and fit them to a flat bed trailer as soon as weather permitted. My son owns a fairly large lawn furniture and pergola construction business and provided us with a space for our initial construction and the western red cedar that would be needed to build the framework of the caravan and the exterior siding. The wood was not a gift but somewhat below market cost.
FRAMING THE CARAVAN
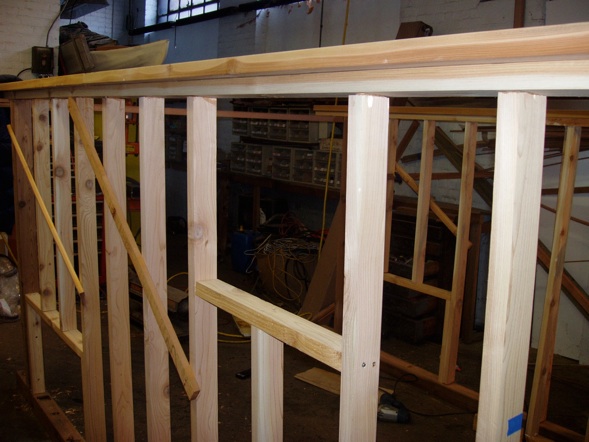
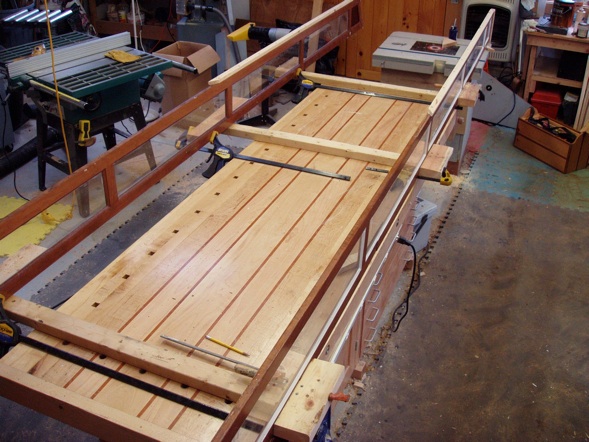
The sills and corner posts were all made of Western red cedar. Using a jig and a router, the sills were mortised to take 2x3 studs on 12” centers. the top plates were also mortised. We wanted the walls to slant outwards 11 degrees so we put 11 degree bevels on the bottom of the sill plate and the top of the top plate. This gave us our desired wall slant plus a level top plate for framing out the roof. Tenons were cut in the ends of each stud and were dry fitted with the mortises cut in the sill and top plates. The final step was to glue each stud to the sill and top plates and secure them with screws driven in from the top and bottom. The corner posts were also tenoned and fit to the sill and top plates. They were glued and fastened with 5/16 galvanized lag screws.
CARAVAN SIDING
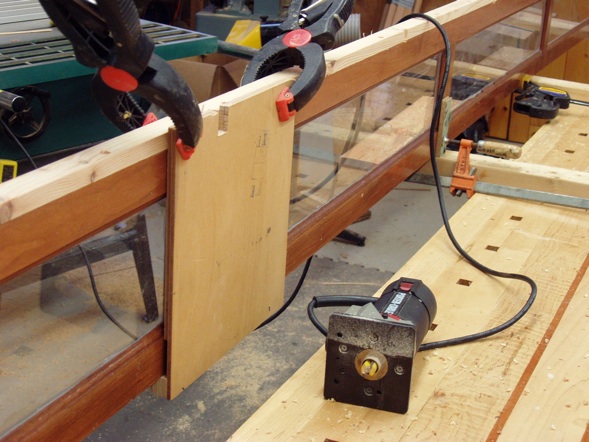
The traditional Reading Gypsy caravans were covered with thin strips of wooden siding. The expense of the caravan increased as the width of the strips decreased, the most expensive strips being referred to as ‘penny board’ which was roughly the width of the British penny. Our strips were cut from 2x6 Western red cedar boards thus being 1 1/2 inches wide by 1/2 inch thick. The final dimensions after routing and sanding were 1 3/8 wide by 7/16 thick. Each strip was passed over the routing table to form a tongue on one side and a groove on the other. Using a chamfering bit a final pass was made to put a narrow bead on the surface of the board about 1/4 inch from the edge of the tongue. This added an additional surface texture consistent with the gypsy adage, the fancier the better.
Before mounting the framed walls onto the trailer, a small portion of each side wall was covered with the pennyboard to provide additional stability. The tongue of the first strip to be attached was cut off on the table saw and then glued down to the transverse 2x2 timber running along both sides about 2/3 of the way up from the sill plate. this is a traditional part of the structure of the Reading Caravan. Before mounting the next strip, a bead of wood glue was placed into the grove of the first board before fitting the second board into the groove. The strip was then nailed to each of the studs.This process was continued until reaching the top strip which was scribed to fit snugly into place under the top sill.

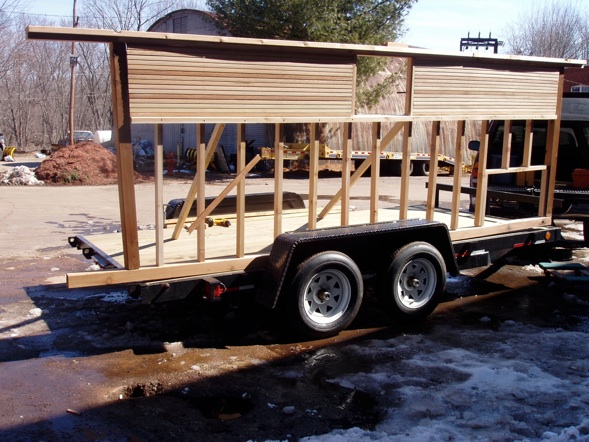
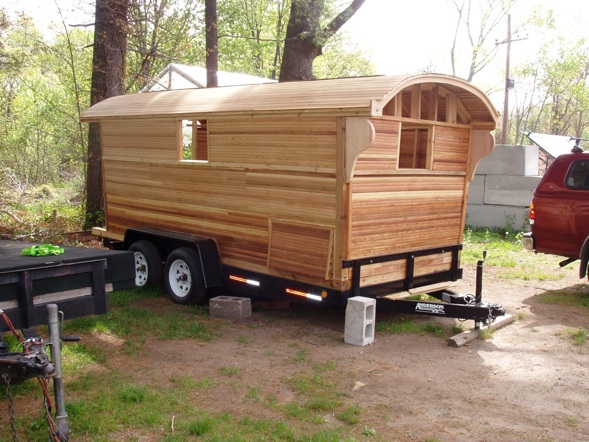
When the weather warmed up enough to work outside, early April, we mounted the walls on the flat-bed trailer. The two outside walls were mounted first followed by the front wall. The rear wall was ocnstructed in place rather than in the shop as it consisted mainly of the dutch door. The sills were fastened to the trailer using 3/8” galvanized carriage bolts, through bolted through the 2x6 pressure treated flooring. Wherever possible, the bolts were secured by passing through both the 2x6” flooring and the steel trailer framework. Once the caravan framework was fastened to the trailer, the application of the penny board siding was completed. A final vertical trim piece was placed over the pennyboard and fastened to the studs with galvanized finish nails. Again, this feature was traditional on Reading caravans.
CONSTRUCTING THE OVERHEAD
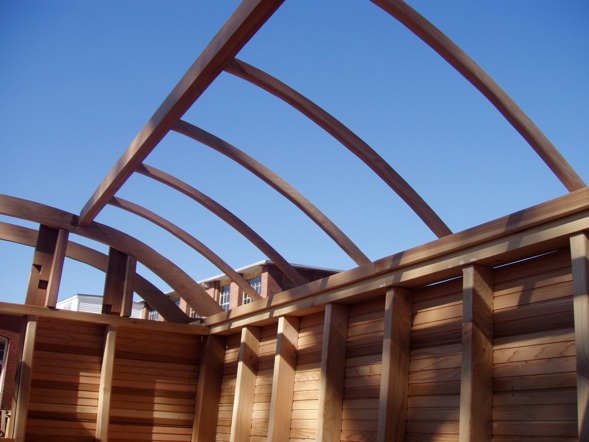
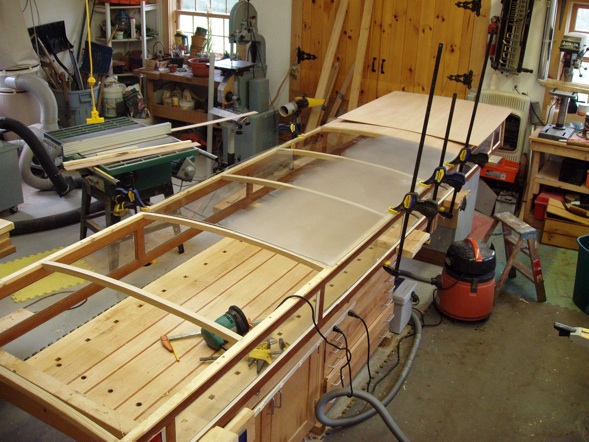
Before removing the cross bracing between the walls, five curved ceiling beams were fashioned and fit to the top plate. Two of the pieces were fitted to the ends of each top plate, two were fitted over the corner posts, two more two feet in from each end, and one fitted in the middle.
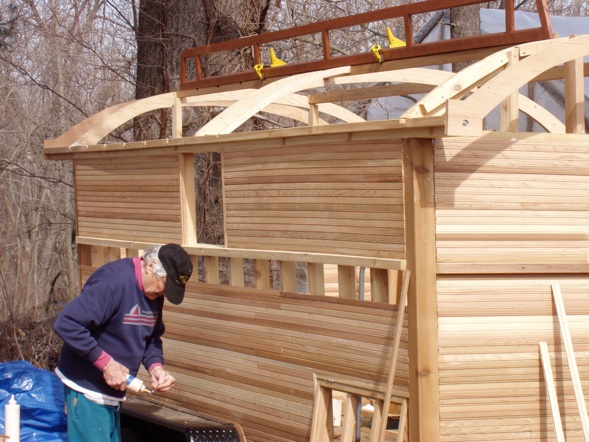
In anticipation of mounting the mollicroft on the roof, two 2x3 beams were placed between the two supports located over the corner beams and notched through the center support. In mounting the mollicroft, it would snugly fit over these two beams and would be secured with caulk and fasteners thus holding it securely to the top of the caravan. The framework for the roof consisted of sawn ash ribs mortised into the two transverse timbers and the top plate The ribs were located 12” apart to match the spacing of the studs.
Bill and I had previously made five strip plank kayaks and decided to use some of the left over strips to serve as the covering for the overhead. These strips were cut from 2x6 western red cedar planks and varied in length from 12’ to 16’. The strips were cut 1/2” thick and then sanded to 3/8” They were then run across the routing table twice: once to put on a bead, the other time to put on a cove. This would allow for a smoothly finished surface over the curved overhead.
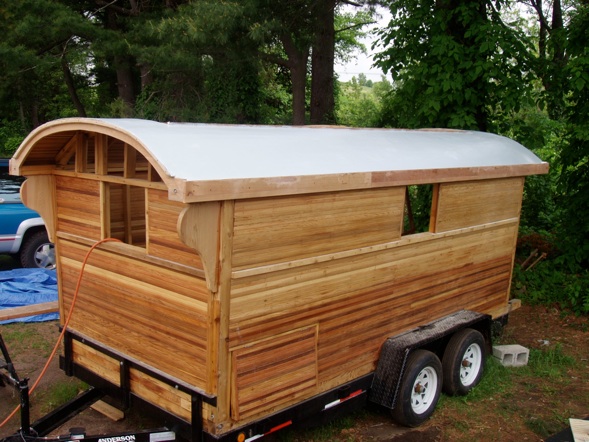
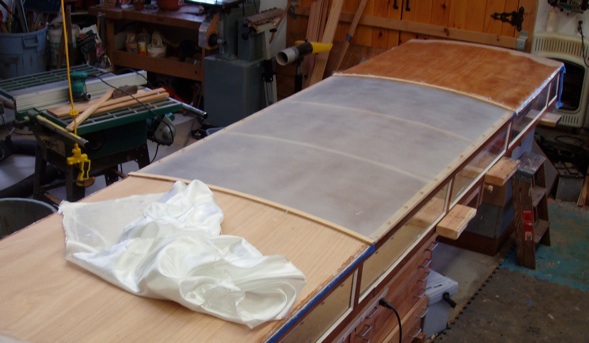
When all of the strips had been applied by edge gluing and nailing into the ribs, the exterior surface of the roof was lightly sanded. When completely smoothed, a 6 oz layer of fiberglass was applied using West System epoxy to adhere it to the overhead. The epoxy was allowed to set up for 45 minutes and then all of the excess was removed with a plastic scraper. Four hours later another coat of epoxy was applied with the scraper and again the excess removed, this time right away. Four hours later a final coat of epoxy was brushed on and worked in until the surface was smooth. Two days later the fiberglassed overhead was sanded smooth using a random orbital sander.
CONSTRUCTING THE MOLLICROFT
The mollicroft was constructed in the shop and when finished, secured to the caravan supports mentioned above. one by three cherry stock was used to construct the two matching sides. A specialized router bit was used to shape the cherry stock to hold four large windows on each side of the mollicroft and two small red windows at each end.
After installing the windows, a 1”x1” strip of ash was fitted to the top of the window frames. Mortises were cut into the ash strips to hold 8 1”x1” ash ribs for supporting the roof material.
An 8’ piece of 1/4” Lexan was placed in the middle of the mollicroft roof. This was to increase natural lighting for the interior. However, to avoid the intensity of direct sunlight, the Lexan was sanded with 100 grit sandpaper on a random orbital sander. This produced a slightly opaque surface thus cutting down on the direct sunlight.
The front and rear sections of the mollicroft roof were covered with 4mm marine grade plywood. A single piece of plywood ran from the Lexan to the fiber glassed roof at each end. The plywood was then fiber glassed using the same technique described earlier.
When the mollicroft was finished it was lifted onto the caravan and placed over the two transverse beams. Counter-sunk holes were drilled through the cherry framework followed by 2” wood screws and cherry bungs.
THE REAR WALL
The rear wall was built in place after the two side walls, front wall and overhead were in place. The major construction feature is the traditional Reading caravan Dutch door. As with the caravans of old, the name of the owner was carved into one of the door panels. Carved in this instance really means routed out on my son’s CNC router using the logo he places on his lawn furniture and pergolas.
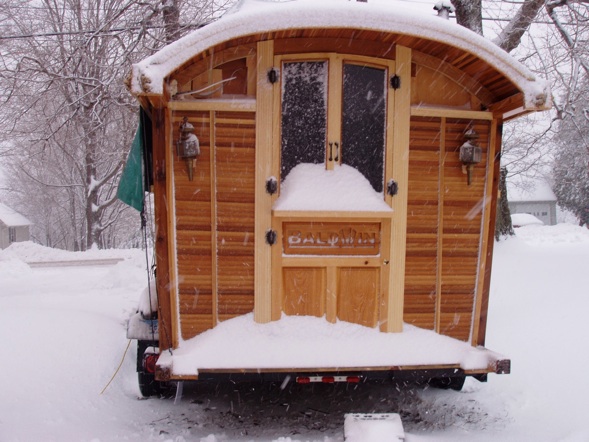
The door frame was made of glued up 1” pine laminates. The raised panels were made from the same 1” pine stock as were the glass doors for the top of the dutch door. The tops of the windows were made to conform to the curve already established in the overhead.
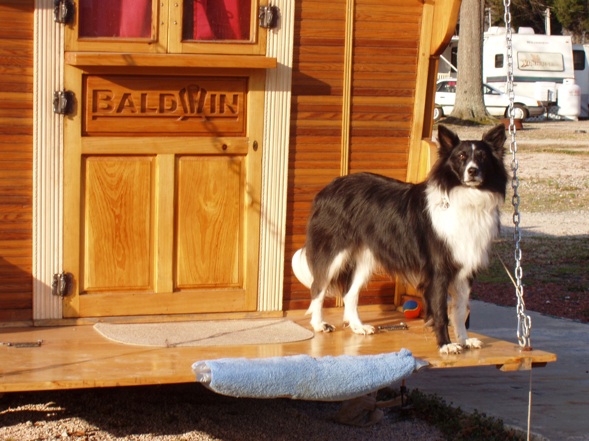
THE REAR DECK
The back deck of the caravan extends 4’ out from the rear wall. The first foot of the deck next to the rear wall is a foot wide and is supported on each side by the extruding sill plates. The final three feet of the deck is hinged to the small portion of the deck attached to the rear wall. It is supported by chains attached to through eye bolts on both outside corners of the deck and through the extruding top plate. The deck is also supported by three planks located in brackets under the deck. These planks are removed and the deck lifted to rest against the rear door when traveling. The entire top of the deck was fiber glassed with 6 oz. cloth set in West System epoxy.
FINISHING THE DETAILS
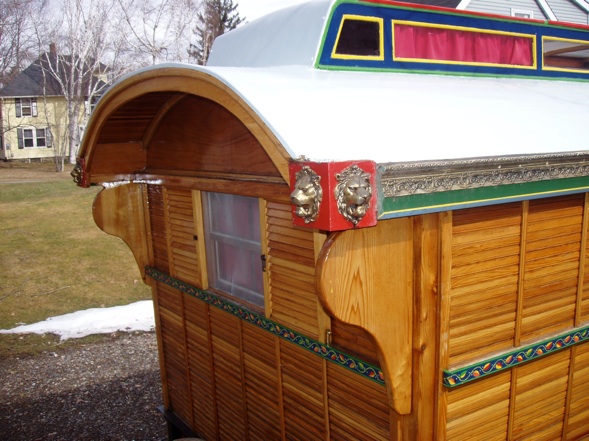
Three ssh windows were made from western red cedar stock for pre-framed openings on both side walls and the front wall. These traditionally sized and located windows are covered in transit or bad weather by sliding shutters which also are found on many old caravans. A 1” by 3” piece of stock was attached to the framing piece running under the windows on both sides and the front. Also a 1” by 4” piece of stock was attached to the top plates on both sides. This allowed for a lower and upper groove for the shutters to slide in. Decorative trim pieces were attached to each of these added pieces and painted with bright colors.
In addition to providing a groove for the shutters to slide in, the trim piece attached to the top plate also provided a gutter to prevent rain from dripping off the roof and down the sides. At the fore and aft end of each gutter, a brass lion’s head was mounted with a hole in the mouth acting to allow rainwater to drain from the gutter. This was a traditional fitting on most Reading caravans. Similar brass lion heads were also attached at the ends of each top plate but for decorative purposes only.
The final exterior project was to construct a wooden base over part of the trailer tongue fitting to hold two 30 gallon propane tanks and a deep cycle battery.
The entire exterior of the caravan was sanded and finished with three coats of Helmsman’s polyurethane.


